Connecting QuickBooks® Desktop to IntelliTrack
QuickBooks Desktop is connected to IntelliTrack at the Desktop Configuration tab.
Important: QuickBooks and IntelliTrack for QuickBooks must be installed on the same computer in order to connect the plugin to QuickBooks.
Warning: Upon initial connection to the QuickBooks company file, both the Plugin and QuickBooks must be open. If they are not both open, you may experience problems successfully connecting the Plugin to the QuickBooks company file. Moreover, Administrator rights are required to set this connection.
Connecting QuickBooks to IntelliTrack
To connect QuickBooks to IntelliTrack, refer to the steps below.
- Open QuickBooks.
- Open your company file in QuickBooks. The Home screen appears.
- Open the Plugin Host Utility.
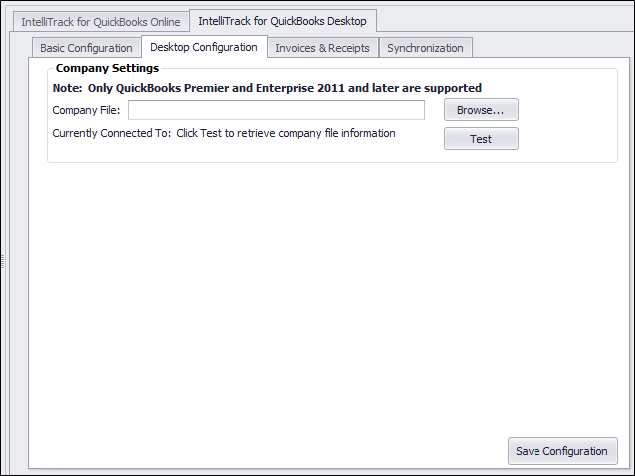
- Click the Desktop Configuration tab to bring this portion to the front. Enter the location of the QuickBooks company file in the Desktop Configuration tab\Company File field.
- Click the Browse button to navigate to the network location of the company file. Locate the QuickBooks company file. Select the file to place it in the Company File field and then select the Open button to close the Select File window and enter the location of the company file in the Company File field. The QuickBooks company file contains a .qbw file extension)
- Click the Test button to test the company file connection.
- The first time that you test the connection to the company file, a form appears in QuickBooks to notify you that the IntelliTrack QuickBooks Plugin is requesting access to the company file.
- To allow this connection, select Yes, always; allow access even if QuickBooks is not running. This will allow continual access between the IntelliTrack for QuickBooks and the QuickBooks company file. Click the Continue button.
- An Access Confirmation form appears, telling you that you have chosen to grant the IntelliTrack QuickBooks Plugin access to your QuickBooks company file. Click Done to close the Access Confirmation form.
- At the IntelliTrack QuickBooks Plugin, click the Test button to connect to the QuickBooks company file.
- Click OK to close the message. The status message along the bottom of the Plugin notifies you that “Testing connection to QuickBooks has completed.”
- You must be able to successfully connect to the QuickBooks company file in order to use the Plugin. If the connection fails, review your Company File settings and try again. If you are still unable to successfully connect to the QuickBooks company file, we recommend that you contact IntelliTrack Technical Support at 888.583.3008 option 6 or by email at support@intellitrack.com.
- Click the Save Configuration button to save the company file setting to the Plugin.
Plugin Preference Settings in QuickBooks
After you connect the plugin to QuickBooks, you are able to manage the IntelliTrack plugin in QuickBooks at the Preferences form. This is a good setting to check if you encounter issues when syncing data with the plugin.
- In QuickBooks, click Edit > Preferences. The Preferences form appears.
- Click the Integrated Applications button found along the left side of the form to bring the Integrated Applications area of the form to the front.
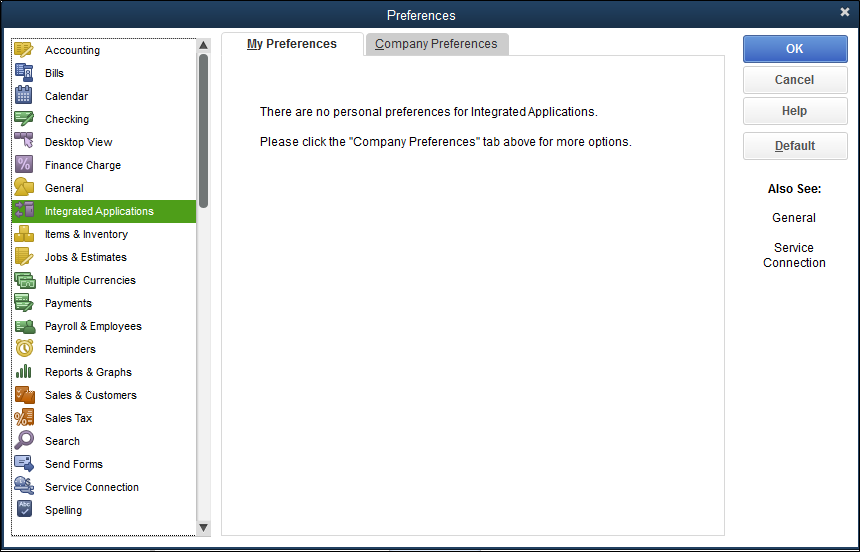
- Click the Company Preferences tab to bring this portion of the form to the front.
- In the Applications that have previously requested access to this company file portion of the form, select IntelliTrack QuickBooks Plugin and then click the Properties button.
- The Properties form for the IntelliTrack Plug In appears. Make sure that the Allow the application to read and modify this company file check box is marked; this allows the IntelliTrack Plugin access to the QuickBooks company file. Make sure that the Allow this application to login automatically check box is enabled. These settings ensure continual connection to this QuickBooks company file.
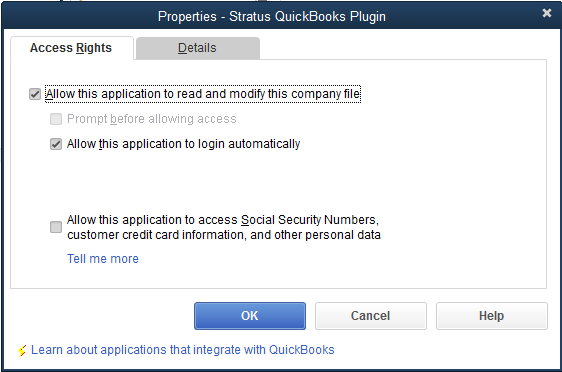
- Click OK to close the Properties form and save your settings.